I will show you how in a rental / condominium can connect an electricity meter. This usually always works in the sub-distribution of your apartment. Thus, you have your consumption at a glance and can track down power guzzlers. This is supposed to be a “living” guide, which I like to optimize further. Leave a comment if something is missing or unclear.
Saving energy has never been as prevalent as it is right now. Even people who have never been particularly concerned about this topic are suddenly looking for ways to reduce their energy costs for heating and electricity. Saving money is not always in the foreground, more and more often you hear that people want to make a contribution to the energy transition. I think that’s good!
I didn’t have a real transparency about our electricity consumption either. To know how much I consume, I have to go to the basement and write down the total consumption value there. But the 5 floors regularly keep me from doing that. And with this sneaker monitoring, you can’t analyze consumption peaks during the day. So after a little research, I ordered a Shelly 3EM. The reviews on it were good, I liked the features, I found the price fair.
So let’s start with the shopping list. You need the Shelly 3EM and a multimeter. You need the multimeter to check which phase runs on which fuse. In Europe it is standard that 3 x 230V arrive in your household. You can bundle these 3 phases and then you have a power connection. You all use this high voltage current at least once in your home: for the kitchen stove. This is especially power hungry. As usual, you can find all the details about the 3 phases and the three-phase current on Wikipedia.
Shopping list
- Shelly 3EM
- Multimeter
- Power cable
- Camping lamp
- Screwdriver
- Plier
BEFORE YOU START:
Please only do this if you have training for it or are very knowledgeable. A layman without knowledge should not work on the fuse box. You can get a fatal electric shock. Always make sure the fuse is turned off. Nevertheless, if you live in a rented apartment, remember that you cannot turn off the incoming phases before the fuse. This is only possible if your apartment in the basement is protected by its own meter or fuse and you have access to it.
The best solution: commission a master electrician company!
However, I also know from my own experience that electricians often do not accept such orders. Either because they don’t know the Shelly and don’t want to take responsibility or because the installation, which usually takes a maximum of 15 minutes, is too short for them and such orders are not worthwhile for them.

Of course you need a battery-powered light, because the fuse box is in the rarest cases in a place with daylight. I have for ages a camping lamp that performs for such purposes a 1a service. You can find the newer version of my lamp at Amazon for a good price.
End result
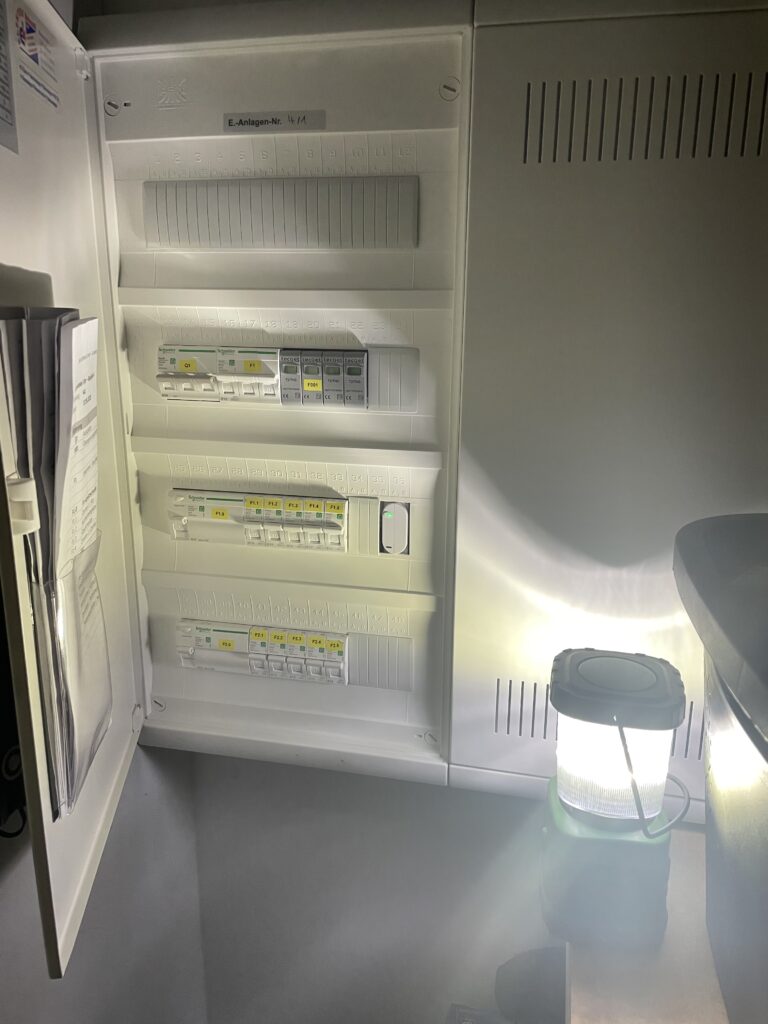
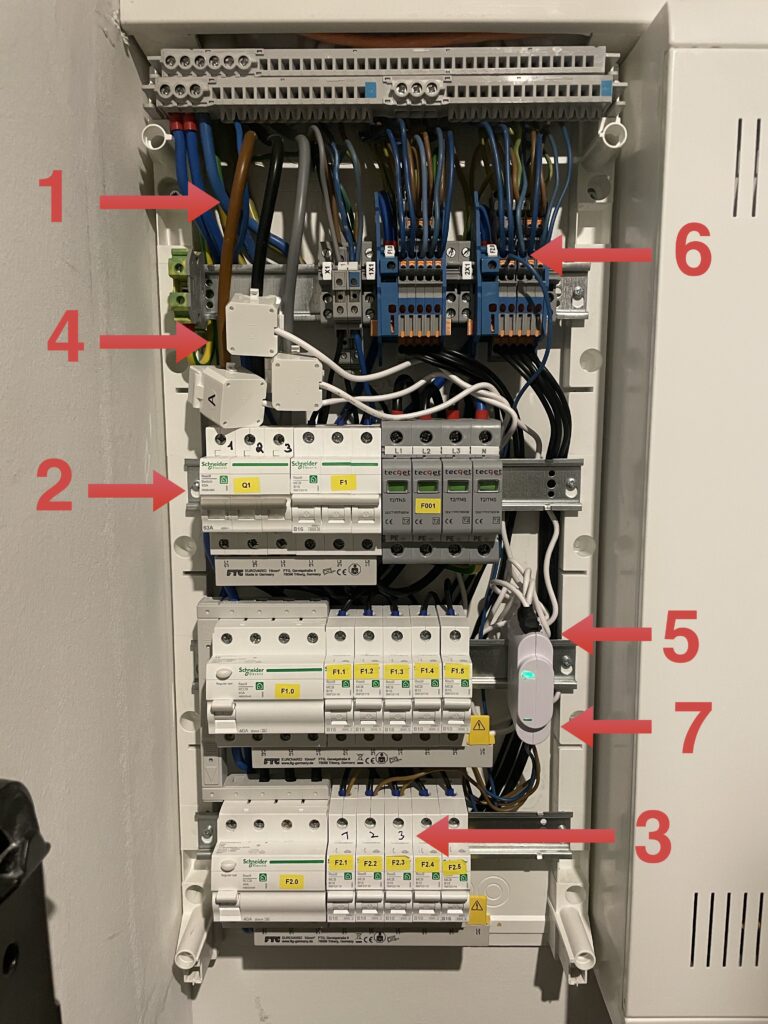
Let’s get straight to the result, this is what my installation in the sub-distribution looks like. On the I will explain what to do.

In 8 steps to install the Shelly 3EM
- The three phases come in from above in the fuse box. Strictly speaking, this is not the “fuse box”, but a sub-distribution located in my apartment.
- Q1 is the main fuse for my apartment. Be sure to turn this off before you start working. I numbered the phases on the main fuse with a pen.
- Then you have to check with the multimeter which phase is running on the fuses behind the main switch. We need one fuse each with phase 1, phase 2, phase 3. Basically, you can assume that the phases are distributed nicely one after the other on the fuses. Fortunately, this was the case with me. It is best to write the number of the phase on the fuse to match the numbering on the main fuse. Then you don’t have to doubt if you remembered everything correctly.
- Then you can attach the clamps of the Shelly. Take A for phase 1, B for phase 2, C for phase 3. You can also try to fix the cables in the fuse box.
- In the next step you connect the clamps to the Shelly. For this you should not have plugged the Shelly on the top hat rail yet. Otherwise it will be too fiddly to plug it in.
- Then you have to look for a neutral conductor (blue) in the fuse box. Take the one you can reach easily. Lead it cleanly in the fuse box to your Shelly.
- Now you have to connect the phases of the fuses you marked in step 3 with the Shelly. Take a protective conductor with a 1.5 mm cross-section in black, brown or gray. I used brown here, because I just had it. Again the principle applies: 1 goes to A, 2 to B, 3 to C.
- In the very last step you switch on the main fuse again. If the shelly blinks and the fuse stays in, you seem to have done everything right :-). I don’t describe the software configuration here, maybe I’ll make a second post about it.
Before I installed the Shelly, I had a lot of respect and jitters. I have watched a lot of descriptions and videos because I did not want to mess up. If the description here still leaves questions open, then please leave this in the comments, I will then improve the article.


Leave a Reply